
Pre Setup Notes
If setting up Zuub specific credentials for a DSO, please see the below:
- Multiple locations (maximum of 10) can share one Zuub specific credential
- Each office and address needs to be listed in the provider dropdown within DxC. The address listed needs to match exactly what is being sent in the request. This is outlined in step 10 of the below instructions.
Set-up Aetna 2FA: Step-by-Step
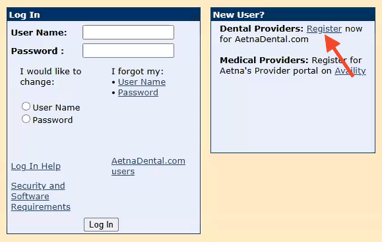
- Navigate to the Aetna provider portal.
- Under New User, next to Dental Providers, click 'Register'
- Click 'Continue to Registration'

- Select “I am a dentist” for the first section and select the appropriate description for the second section. Then click 'Continue.'

- Enter the required information and click 'Continue'
- If individual practice is selected:
- Last Name: Provider's last name
- First Name: Provider's first name
- Date of Birth: January 01, 1980
- TIN: Offices's tax ID

- If group is selected:
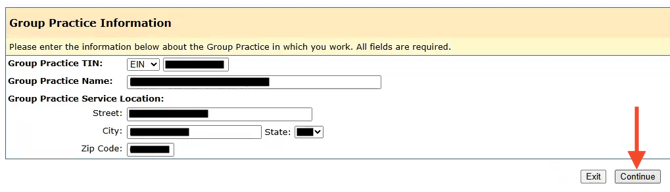
- If individual practice is selected:
- Fill out the required information with the below and click 'Continue'
- Your Last Name: Admin
- Your First Name: Insurance
- Your Date of Birth: January 01, 1980
- Username:
- Password:
- Re-enter Password:
- Select one of the security questions:
- Answer to your security question:
.png?width=670&height=277&name=Aetna-5%20(1).png)
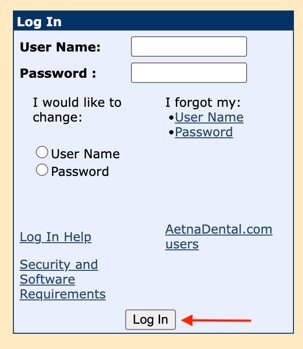
- Click 'Log In.'
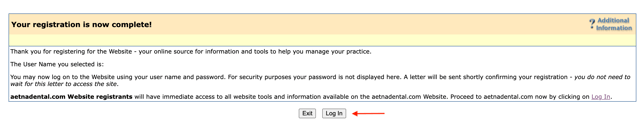
- Sign into the Aetna provider portal using the logins just created.
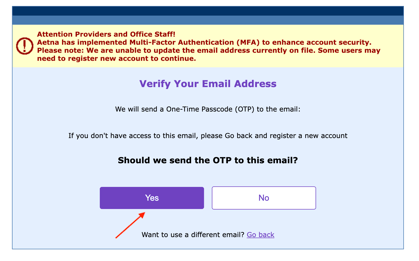
- Verify the email provided is the correct one that will receive the 2FA email code. Click 'Yes.'
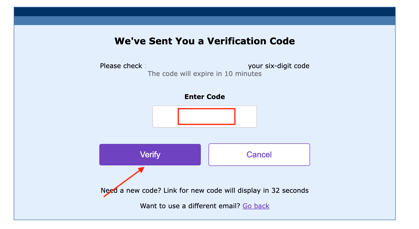
- Navigate to the email address and retrieve the 2FA code.

- Input the code and click 'Verify.'
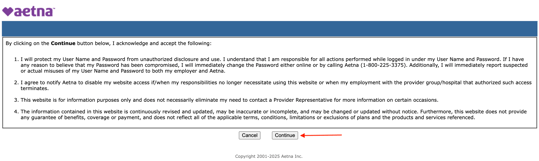
- Click 'Continue' to acknowledge the terms and conditions.
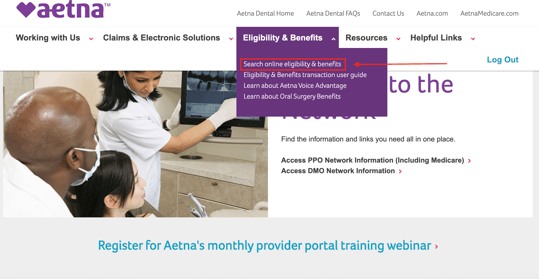
- From the homepage, navigate to the 'Eligibility & Benefits' dropdown menu within the navigation bar.
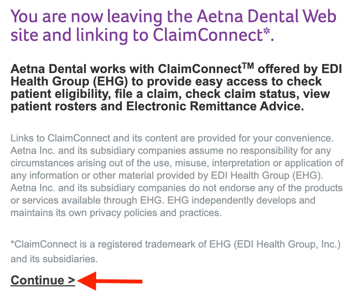
- Select 'Search online eligibility & benefits'
- Click 'Continue.'
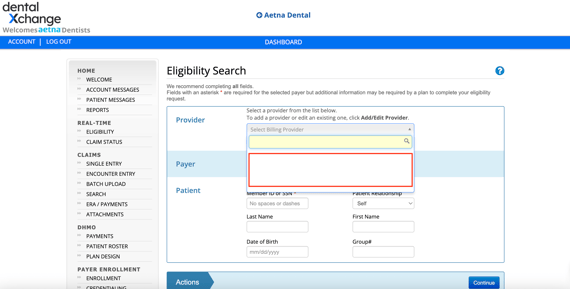
- Ensure each office and address are listed within the 'select billing provider' dropdown menu and add the information if it's missing. Step by step instructions on how to adjust or add office information can be found here.
- Note: If setting this up for a DSO that is sharing with multiple locations, each office and address needs to be listed. The address listed needs to match exactly what is being sent in the request.
- Note: If setting this up for a DSO that is sharing with multiple locations, each office and address needs to be listed. The address listed needs to match exactly what is being sent in the request.
This resource was updated 11/10/2025.